Summary
This guide will walk you through creating a reusable Ticketed Bookings Activity Template to schedule activities like Swimming or Ice Skating. In this example, we'll create a 60-minute Ice Skating Ticketed Bookings template.
Before You Start
This guide will show you how to create a Class Bookings Template for scheduling activities, such as fitness classes. Before starting, ensure you have created a booking pricing option for this activity. If not, please refer to the Fast Tickets Pricing Option Guide.
Note:
To navigate within the template creation process, use the tabs at the top of the page. Avoid using your browser’s back button. You can switch between saved tabs but must complete each step in sequence before moving forward.
Step-by-Step Guide
1. Access the Activity Template Module
- From the Home page, navigate to the Activities V2 Module.
- Under Activities, select Activity Template.
- Click on Create a New Template.
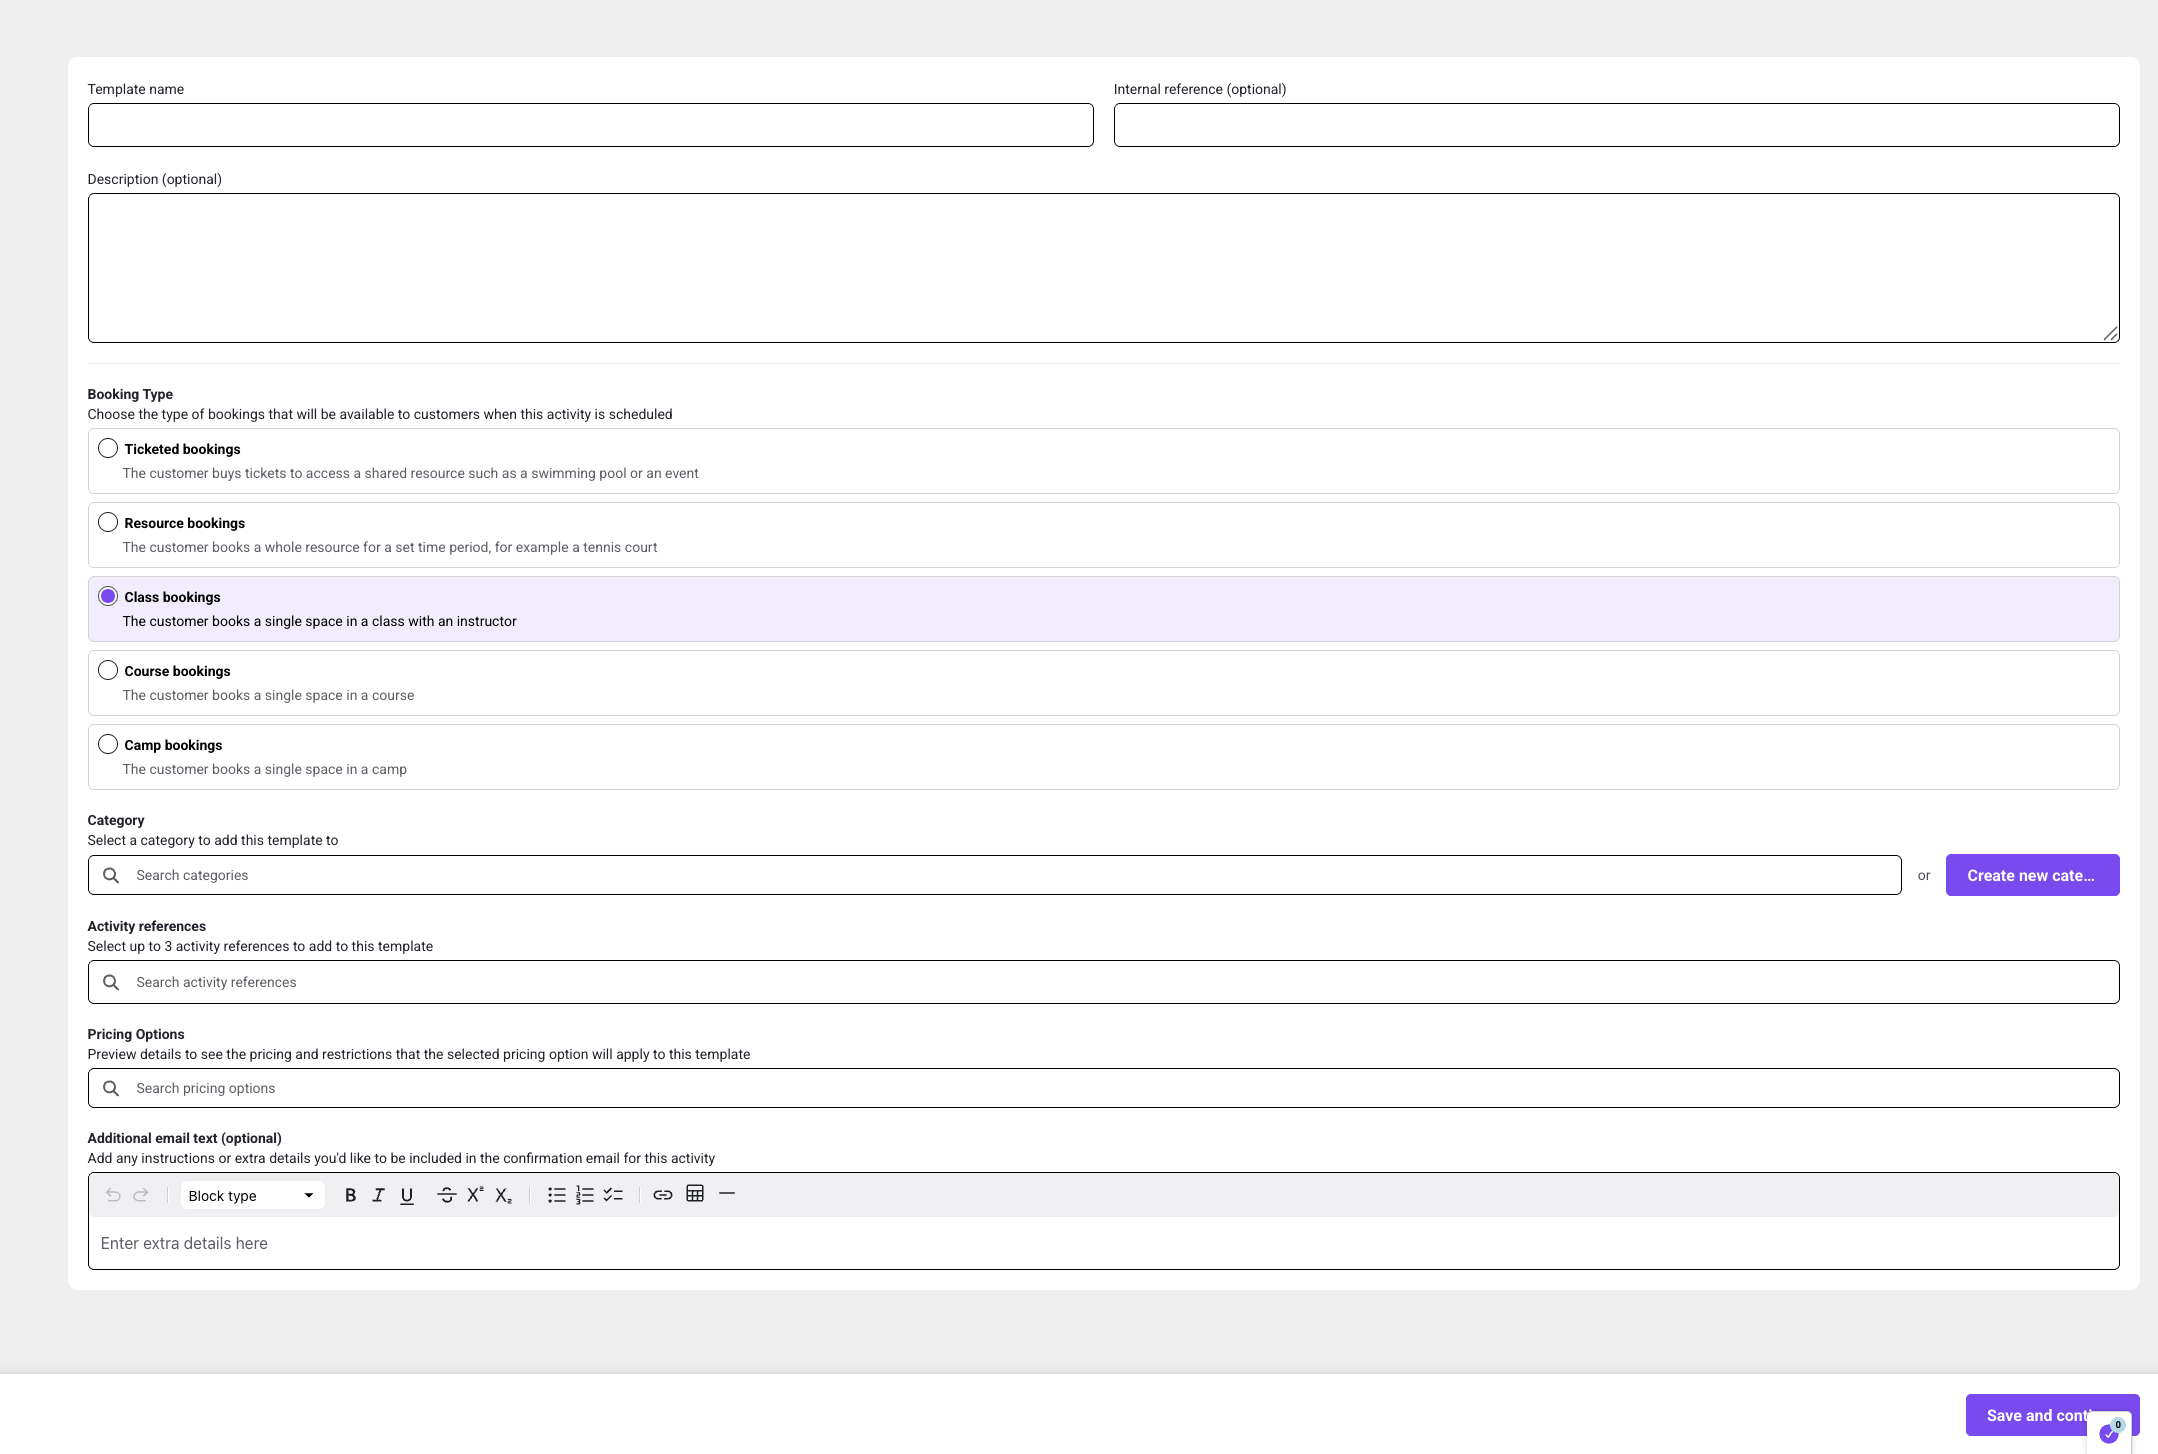
2. Set Up Template Basics
-
Template Name – Enter the display name for the template.
-
Internal Reference – Optional field for internal use.
-
Description – Optional description.
-
Booking Type – Choose Ticketed Bookings.
-
Category – Select or create a category.
- To create a new category, click Create a New Category and follow the additional prompts.
If needed, you can delete or change the category by selecting the delete icon.
- To create a new category, click Create a New Category and follow the additional prompts.
- Activity Reference(s) - For MCR Active only.
-
Additional email text (optional).
This field will inherit the email notification template, but you can add additional booking information here, which will be sent as a PDF attachment along with the standard Booking Successful email.
-
Add a Ticket Type – Select Create Ticket Type.
- Enter the Ticket Name and select the number of attendees this ticket will admit.
- Select a pricing option for this ticket type.
- You can preview the details if needed or delete them if you made a mistake.
-
Extras (optional).
You can add extras such as swimming goggles. - Save Ticket Type.
- Repeat the process if you need to add more ticket types.
- Click on Save and Continue.
3. Configure Advanced Settings
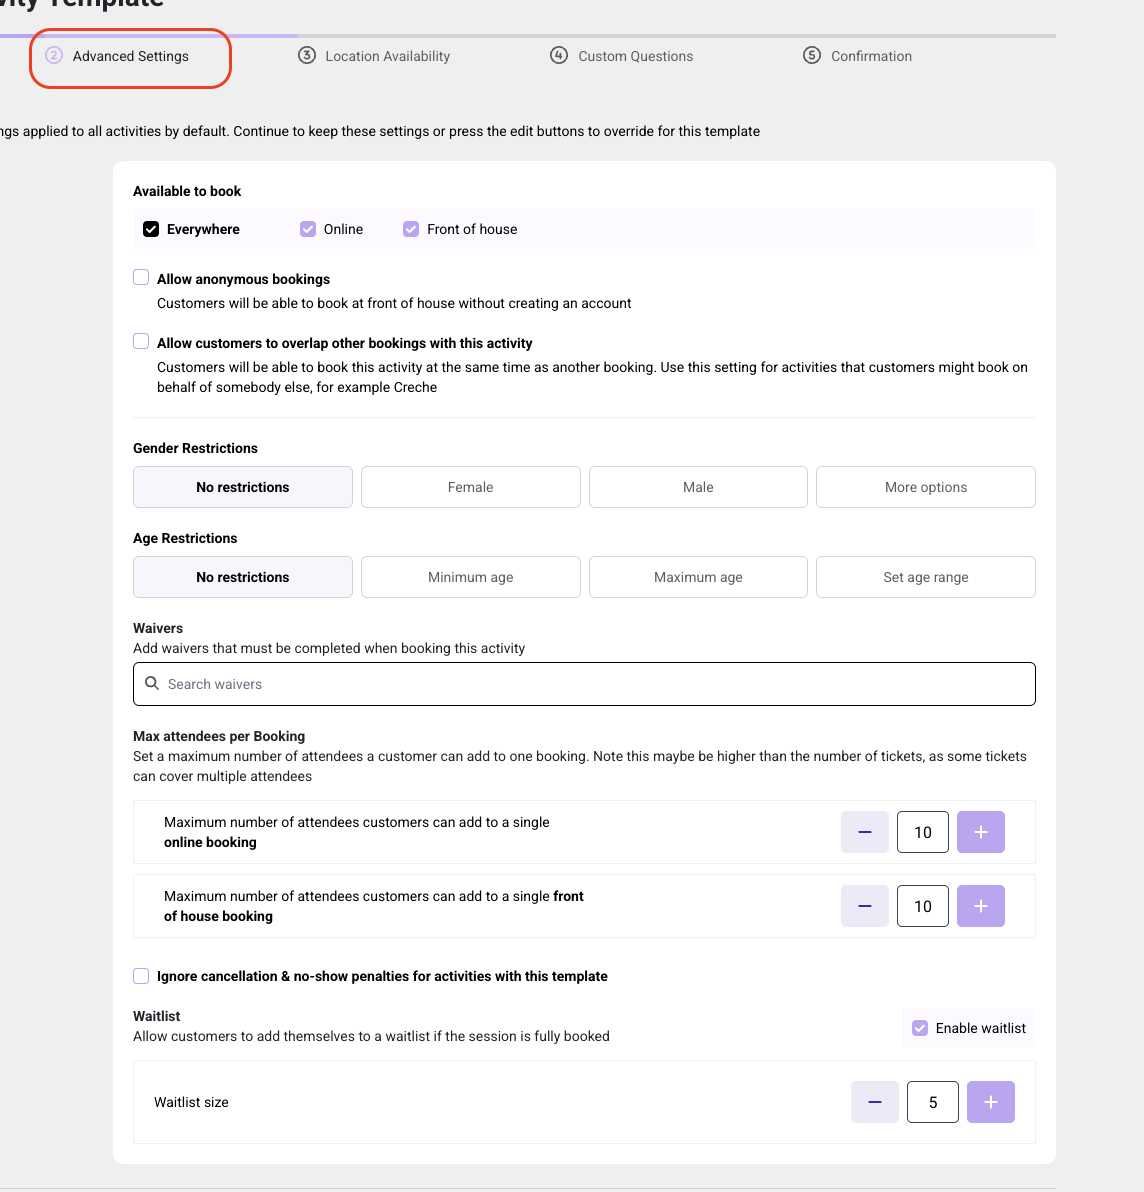
- In the Advanced Settings tab, configure the following:
-
Booking Restrictions
-
Availability – Set availability as Everywhere (default), or specify Online or Front of House only.
-
Anonymous Bookings – Enable this option to allow bookings without an account.
Note: This functionality only works at the FOH. Customers cannot book anonymously online.
-
Overlap with Other Bookings – Enable to allow simultaneous bookings with other activities.
-
Gender Restrictions – Defaults to no restrictions. Click More Options for additional selections (Optional).
-
Age Restrictions – Set a minimum, maximum, or age range (Optional).
-
Waivers – Add any required waivers (optional).
-
Max attendees per Booking – Set a maximum number of attendees a customer can add to one booking Online and at Front of House. Note this maybe be higher than the number of tickets, as some tickets can cover multiple attendees.
-
Ignore Cancellation & No-Show Penalties – Disabled by default.
-
Waitlist - Configuring the waitlist on the activity template determines whether this activity will have a waitlist and sets the maximum number of people who can be on it.
To disable it, untick 'enable waitlist'.
-
Availability – Set availability as Everywhere (default), or specify Online or Front of House only.
-
Advance Booking Timings
- Inherit the system’s global settings, or customise here by selecting Edit Booking Timings.
-
Booking Windows – Set the days in advance that customers (members, non-members, or anonymous) can book online or at the front desk.
Note: Anonymous customers can only VIEW activities. They cannot book them online without being logged in. FOH staff can, however, book a ticketed activity for a customer without an account.
Online:
Front of House:
-
Cut-Off Times – Set online and front desk booking cut-off times.
Online:
Front of house:
-
Release Time – Define when new spaces become available.
-
Waitlist Cut-Off – Set the waitlist closing time.
-
Booking Cut-Off time - how long after an activity has already started can customers still book it.
-
Cancellation Window – Set the time frame for cancellations.
- Inherit the system’s global settings, or customise here by selecting Edit Booking Timings.
- Click Save and Continue when finished.
4. Set Location Availability
- By default, all locations are selected. Deselect any locations where this template should not be available.
To re-add a facility, click the + icon next to its name, or select Add All.
Click on 'Save changes'
5. Questionnaire (Optional). You will need to have already created the custom questions. Please refer to this guide for further information.
In the custom questions tab, you can add custom questions for your customers to fill in. You can configure them to be required or optional.
1. Click on 'Create New Section'.
2. Add a Section Title (required).
3. Add a description (Optional).
4. Add questions by ticking the ones you want. You can narrow down your search by typing in keywords in the search bar.
5. Click on 'Save Section'.
6. Click on 'Save Template'.
Your Resource activity template is now configured and ready for use!